| www.mysticparts.com ©Mystic Reel Parts LLC Questions? |
 Copyright © Alan Tani Reprinted with permission of the author.
With additional notes added by M. Albertson @ MysticParts.com
|
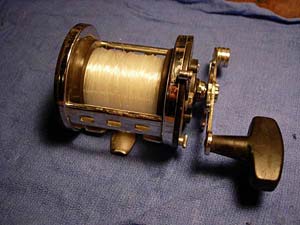
I'm not trying to make you feel, um, "g - u - i - l - t - y ....", or anything, but I know you have one of these reels. I can tell by the way you shuffle your feet. C'mon, it's not that bad. We've all had one of these reels before. It might have even been your first. there's no reason to be embarassed about owning a jigmaster. It was once considered to be one of the best reels on the market. It can be once again. |
QUICK LINKS TO JUMP TO SECTIONS: |
Here's a link to the schematic....
500 Jigmaster Schematic and you can order parts here: https://www.mysticparts.com/PennParts/Penn500.aspx
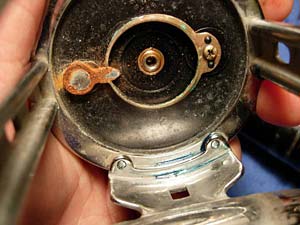
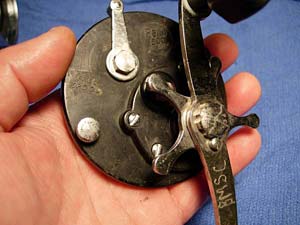
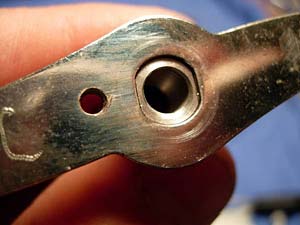
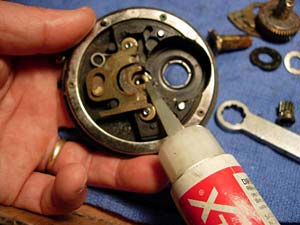
and here is your old friend.
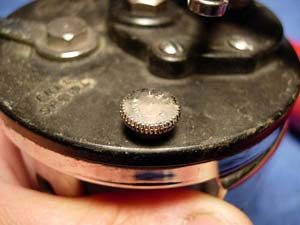
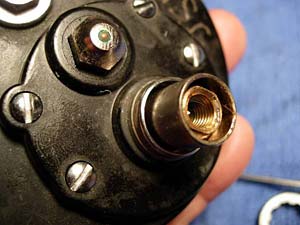
Did you ever wonder that this little screw was for? back out this take apart thumb screw (key #42), lift the screw up slightly, and twist the entire right side plate counterclockwise. I t comes right off!
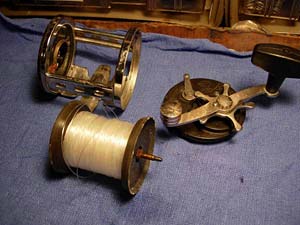
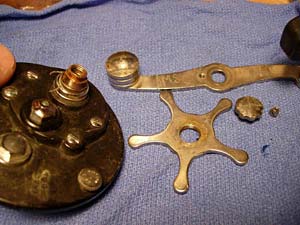
You now have three pieces.
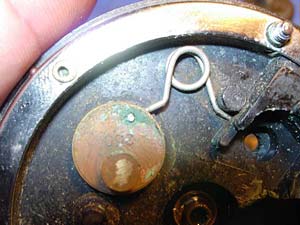
Clicker Assembly
Let's grease the left side plate screws (key #32 and 39). Back out each one, one at a time, grease the screw hole and zip the screw back in.
Apply grease to the click tongue (key #35) and click spring (key #62). add Corrosion X to the left side bushing (key #40).
Back out each one of the right side plate screws (key #31 and 38), one at a time, grease the screw holes, and zip the screws back in.
Grease the inside of the left side ring and wipe off the excess.
Re-install the spool and set the assembly aside.
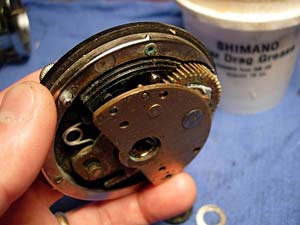
Handle Side Assembly, Gears, Drags
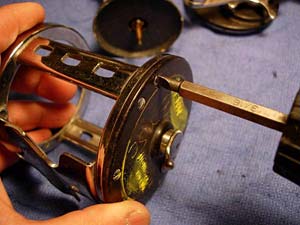
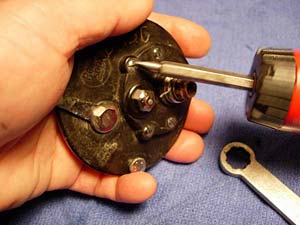
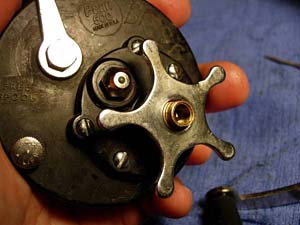
Now for the right side plate assembly.
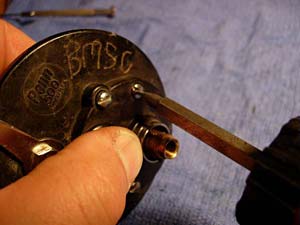
Remove the handle lock screw (key #23a), the handle screw (key #23), the handle (key #24) and the star drag wheel (key #10).
Back out the four bridge screws (key #16 and 17) but leave them in place!!!!!!
The bridge assembly is now loose underneath. imagine your hand is a small crane. lift the right side plate (key #1) straight up, move it straight over to a safe place, and set it straight down without tipping it over. Eesist the temtation to look underneath. For now....
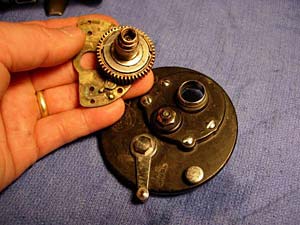
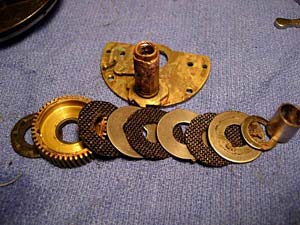
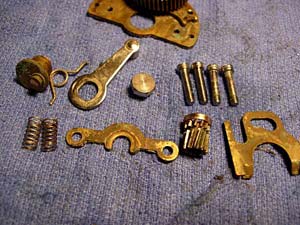
Carefully line up all the components of the drag stack and bridge assembly.
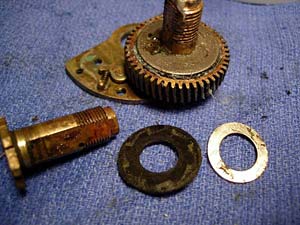
Bridge Assembly, Gears, Drags
Ok, now it's decision time. on the right, you see a brand new stock brass gear sleeve. On the left is a brand new pete kolekar stainless steel gear sleeve (98-60AT). In the middle is the original stock brass gear sleeve and it's trashed! I only recommend a stainless steel gear sleeve if you INTEND to exceed 8 pounds of drag.
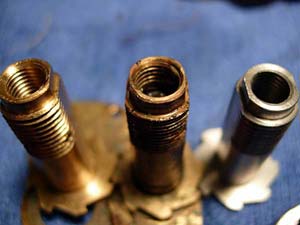
Here's how the trashed gear sleeve fits in the handle. You can see how much play it has.
Here's the new brass gear sleeve. Not to bad, but there's still a little play.
Here's the stainless steel gear sleeve.
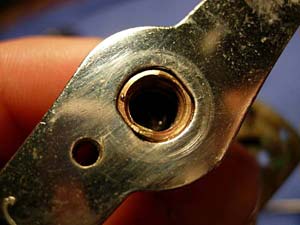
Gear Sleeve Installation & Troubleshooting
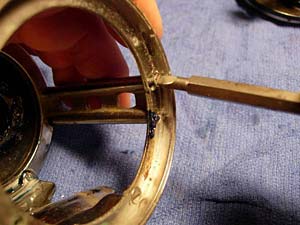
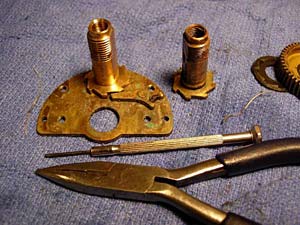
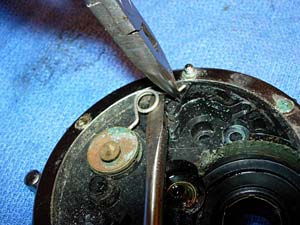
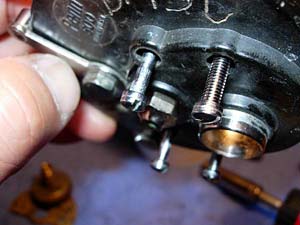
Using a small punch, remove the brass retaining pin.
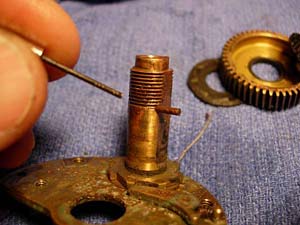
Pull the old gear sleeve, clean up the the bridge and lube it up with Corrosion X.
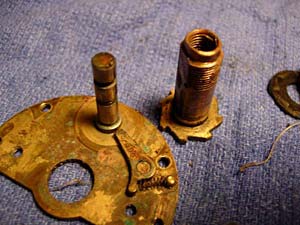
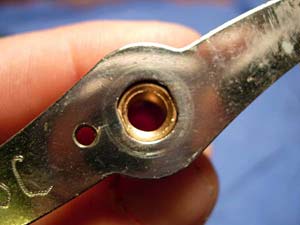
Install the new gear sleeve and retaining pin.
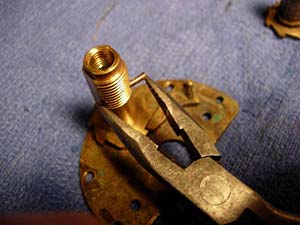
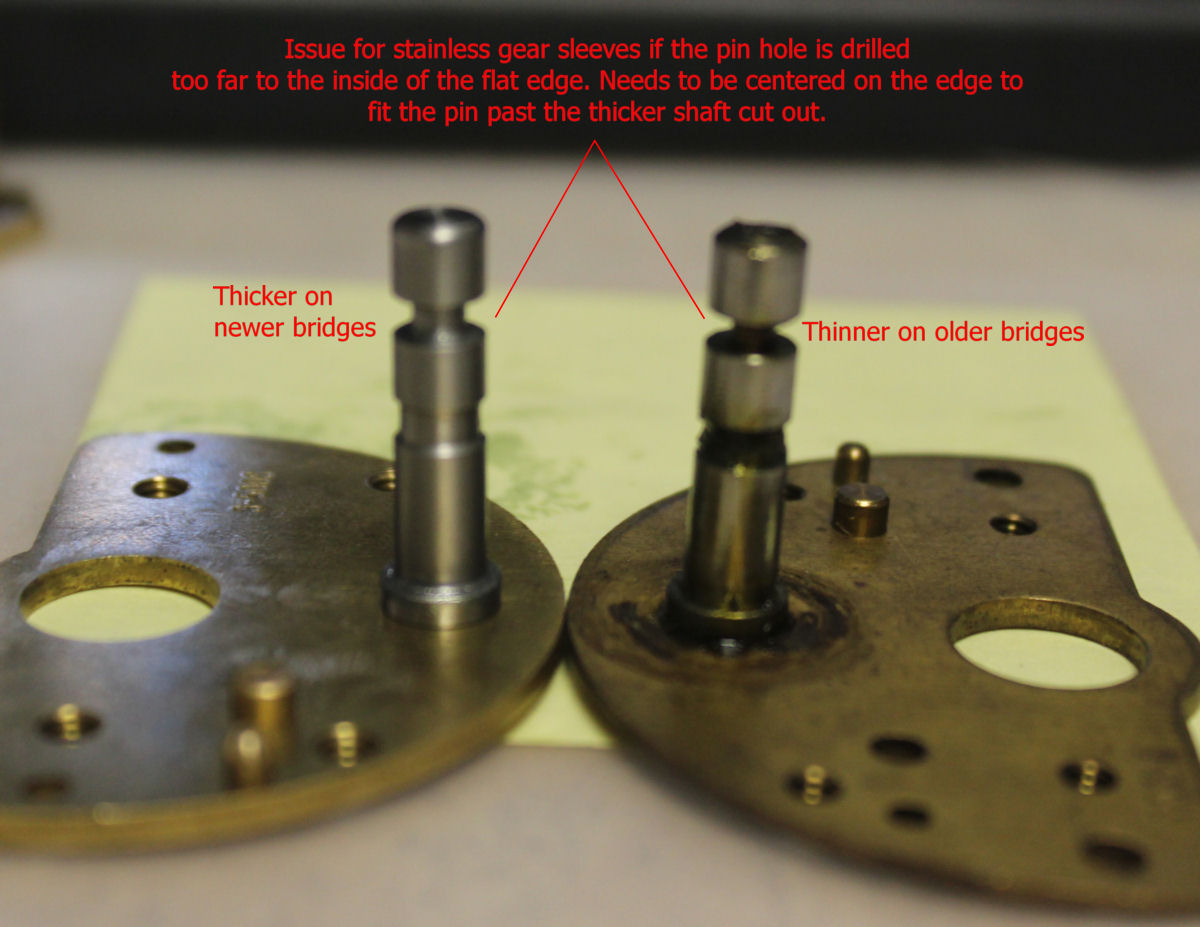
SLEEVE BINDING ON BRIDGE ~Mo's Notes:
If you find it's binding on the bridge after you have installed the pin.
The problem is in Penn's bridge design change over time. One design has a deep indent in the bridge post. The other, it's thicker. The pin binds up on the thicker bridge neck. Filing down one side of the pin should solve the problem so that it can slip past the neck. You can do this by hand on coarse sandpaper, use a hand file, or a pair of pliers and a moment on a bench grinder is my approach. Put a flat edge on it, then test; file more if needed. The flat goes towards the bridge post, allowing more room for the pin to set properly if the neck on the post is thicker.
Done installing the sleeve, lets move on.
I like to replace the fiber washer (key #4) with the drag washer from the black side plate penn 4/0 senator 113. This drag washer (part #6-113) has the same inner and outer dimensions as the long beach washer (part #6-60), but it's thicker. I use this washer under the gears of many reels using the jigmaster gear sleeve (part #98-60).
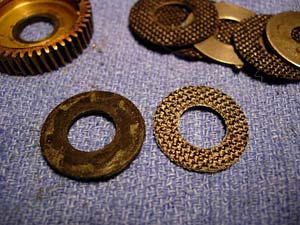
Grease up the rest of the drag washers and install them with the metal washers. Make sure the metal washers are alternating "slotted - keyed - slotted."
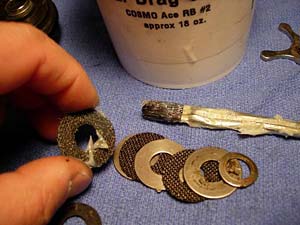
Because the #6-113 drag washer under the gear is thicker than the stock fiber washer (key #4), I usually discard the tension spring (key #8).
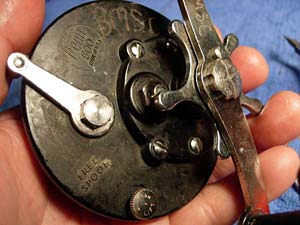
Now, your side plate is still sitting there, quiet and undisturbed.
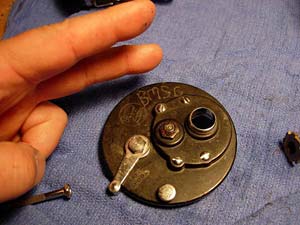
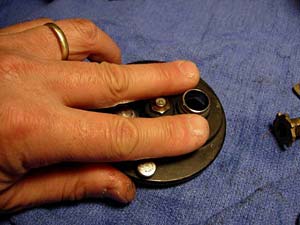
Cover the bridge screws with your left index and middle fingers so the screws do not fall out.
NOTES BY MizMo: Easier than holding the screws in place with your fingers.
Using removable scotch tape (Magic Tape), tape over the bridge screws on the outside to hold them. This frees up your hands to work on the inside parts. MUST be removable tape.
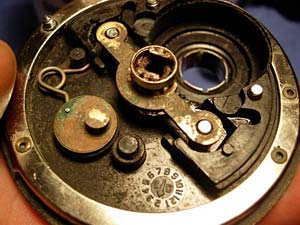
Ok, NOW you can look at the guts of the side plate.
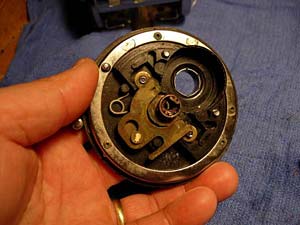
Remove the pinion gear (key #13), lube the right side bushing (key #26) with Corrosion X, and put the pinion gear back.
The bridge/main gear assembly goes straight in. no muss, no fuss. Pinch everything together, zip down the four bridge screws and you're done!!!!!!!!!!!
Eccentric / Anti-Reverse & Troubleshooting
Did you say something?
Huh? What was that? What accident? What do you mean, you had a little accident? How many pieces?

Ok, look, it's not that bad. First, let's line everything up. See, that looks better already!
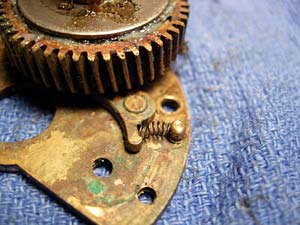
First is the eccentric (key #19) and eccentric spring (key #20).
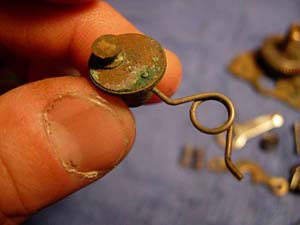
Grease it up a little and stick it back in the hole.
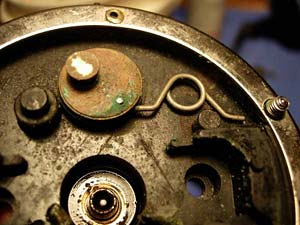
Stick the eccentric lever (key #21) back on....
and bolt it down with the eccentric screw (key #22).
Stick a screwdriver blade under the spring to lift it up a little, then grab it with the needle nose pliers.
Crank the tip of the spring HARD and stick it into the slot of the side plate. The lever should now snap back and forth sharply.
Now for the bridge screws (key #16 and 17). Note that two are threaded all the way up and down, and two are threaded only at the end. the clutch springs (key #19) ride up and down on the bridge screws with the short threads.
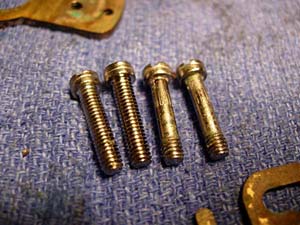
Short threads on top, long threads on bottom.
Two fingers over the bridge screws, flip over the side plate and install the clutch springs (key #18). Oh, and lube the right side plat bushing (key #26) if you haven't already.
NOTES BY MizMo: Easier than holding the screws in place with your fingers.
Using removable scotch tape (Magic Tape), tape over the bridge screws on the outside to hold them. This frees up your hands to work on the inside parts. MUST be removable tape.
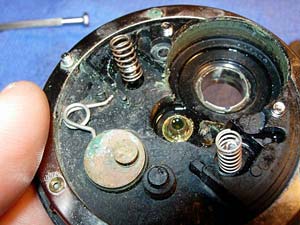
Install the pinion yoke (key #12) and the pinion gear (key #13) as a unit.
Shimmy the eccentric jack into position. You may need needle nose pliers to snap it into position.
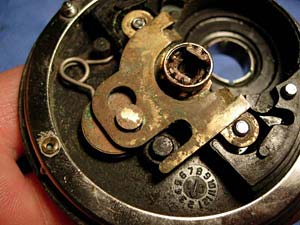
Make sure the dog (key #15) and dog spring (key #14) are in proper position.
NOTES BY MizMo: Here is another place where removable tape can help you.
Using removable scotch tape (Magic Tape), tape over the dog and spring once you have them positioned. Then when you rotate the bridge into position, gently slide out the tape. MUST be removable tape.
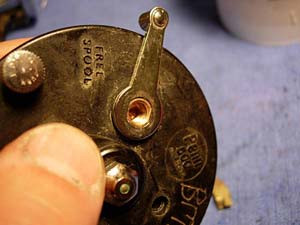
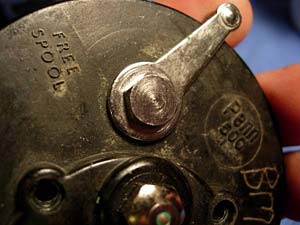
Snap it together.

Bolt it down. Take a moment now to make sure the free spool lever and anti-reverse mechanism work.
Install the spacing sleeve (key #9).
Install the star drag wheel (key #10) and screw it down as far as it will go. don't skip this step.
Install the handle (key #24) and handle screw (key #23). turn the handle screw down until it seats, the crank it around HARD until the handle screw has rotated one or two slots and line up the slot with hole for the handle lock screw. Now install the handle lock screw (key #23a).
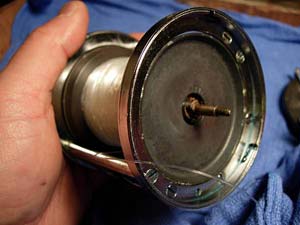
Line up the side plate with the left side plate ring, push the side plate down, then turn it clockwise until the take apart thumb screw "clicks." turn the screw down and you're done! Congratulations.!
See, that wasn't so bad......
Copyright © Alan Tani Reprinted with permission of the author.
Order parts online for this reel(s):
https://www.mysticparts.com/PennParts/Conventional.aspx#Jigmaster
0 Comments