
 |
By Maureen Albertson |

Go here https://www.mysticparts.com/PennParts/Spinning.aspx#SS1stGen to order parts and access the schematics for the reel. This photo guide can be used as a reference for working on the smaller Spinfisher reels, as well.
Today's victim for our reel-topsy table is the 704Z. There are also some shots from and older 706.
As usual, take your time and lay out everything on a non-rolling surface in the order that you took the part off of the reel, in order to make reassembly easier. I use only key #s from the schematic drawing here. See page 2 of our schematic to match those key #s to the actual part numbers.
- Quick jump to specific parts:
- Bail and Springs
- Bail Spring, Line Roller Side
- Bail Spring, Release Side
- Clicker
- Drag Washers
- Dog, Spring and Eccentric (Penn 706 reel)
- Gears
Or just start reading from here:
Bail and Spring installation on a Penn 704Z series spinning reel.
My sample reel had the bail wire assembly completely removed. So we'll start inside the rotor, underneath the spool. You'll see the #60 thrust washer on the shaft. If it's missing (make sure it's not stuck to the spool) you'll need to order one.
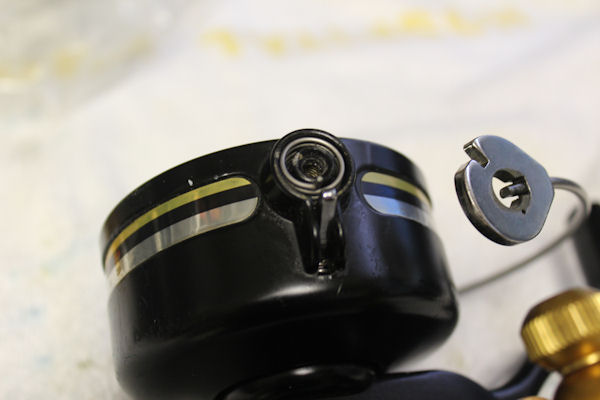
You can see the slot where the #28 bail release arm needs to be installed. I have already placed the #30 spring.
The lever will go into the rotor cup with the "tooth" towards the hole in the rotor.
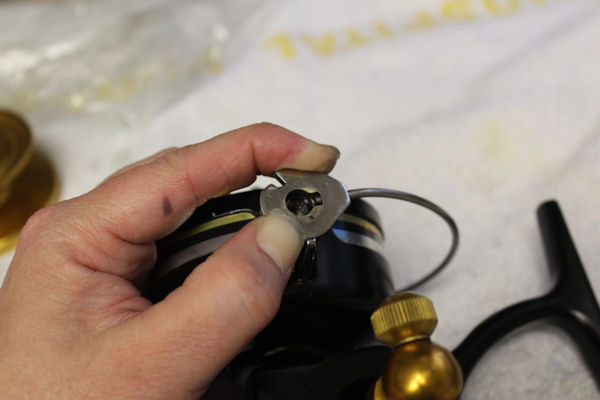
#29 bail release pin is what the bail release arm pivots on. This assembly will sit like so, with the spring centered on the tooth.
Install the #28A bail release saddlwse and screw it in place with the two #46A screws. Second image had the shaft removed, showing the saddle/arm from a different angle.
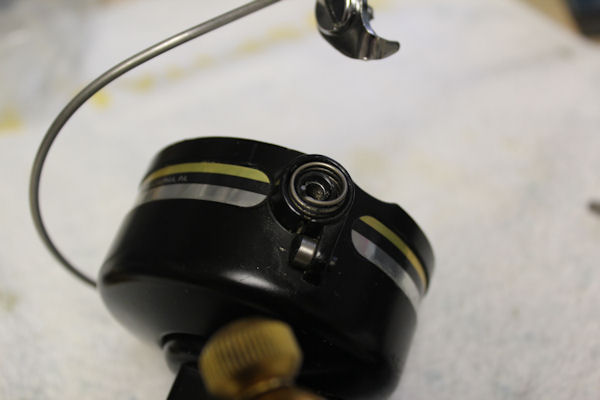
Bail Spring, Line Roller side: Key #32 bail spring positioned as shown with the tag end through the slot and the bent end sticking upwards to hook into the arm on the wire.

#32 bail spring, inserting the bent end into the arm
#32 bail spring, push the #34 arm gently up and around to the left a little, to position the arm over the hole in the rotor, then screw it part way down so that the spring doesn't jump while you adjust it.
Adjust the arm so that it is properly positioned against the #33 bumper, spring in place, and tighten the rest of the way.
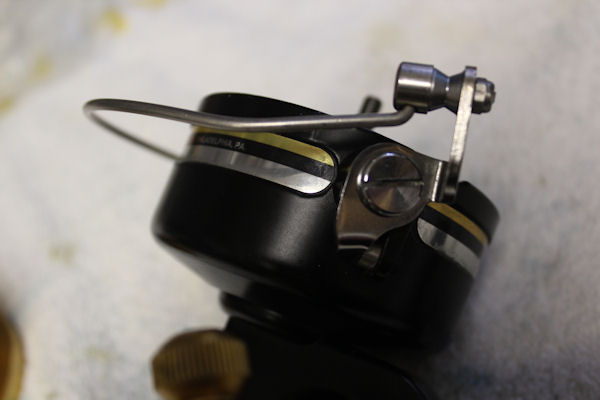
Bail Spring, Release Arm side: Key #32r bail spring positioned as shown with the tag end through the slot and the bent end sticking upwards to hook into the paddle on the wire.
#32r bail spring, inserting the bent end into the paddle.
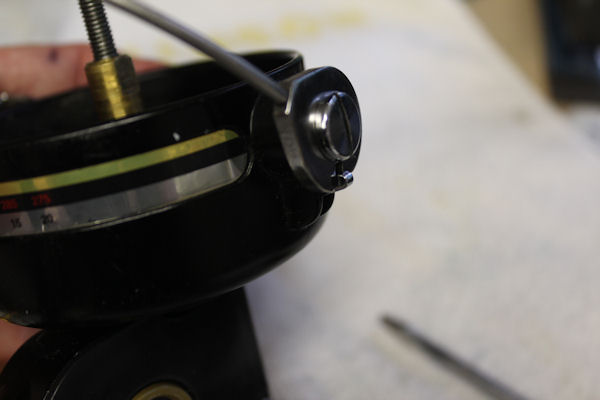
You can see the tip of the the bail release arm sticking out under the locking paddle in the proper position. When installed properly, the cut in the paddle locks on the tip of the arm when the bail is fully opened.

Drag Washers: I have laid out the stack in the proper order from the spool to the ring that holds them all in the spool.
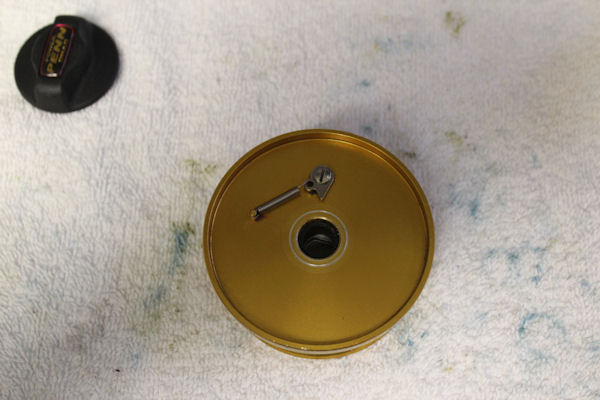
Clicker, Gold spool Just for reference, showing the proper positions of the click tongue and spring. See also: 704/706 Green Spool - Old Style Clicker
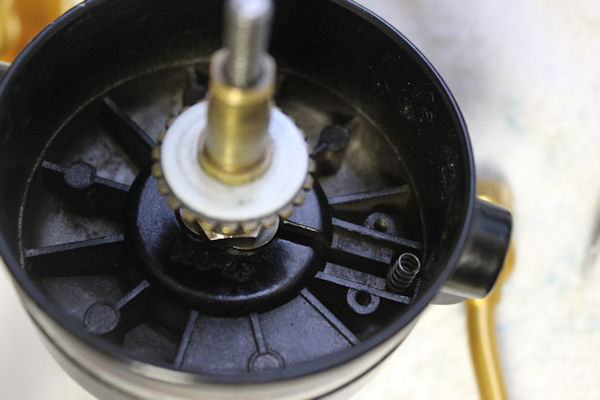
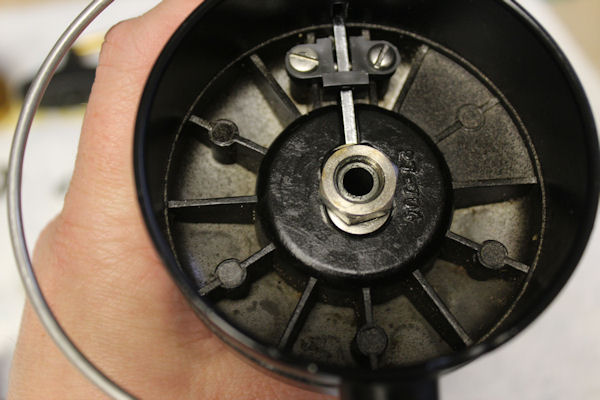
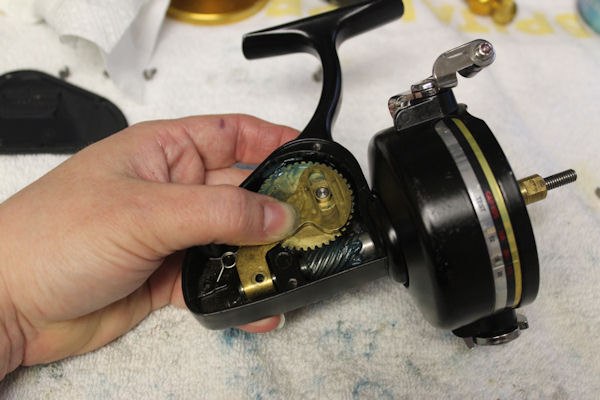
Main and Pinion Gears: How to access them for repair and cleaning.
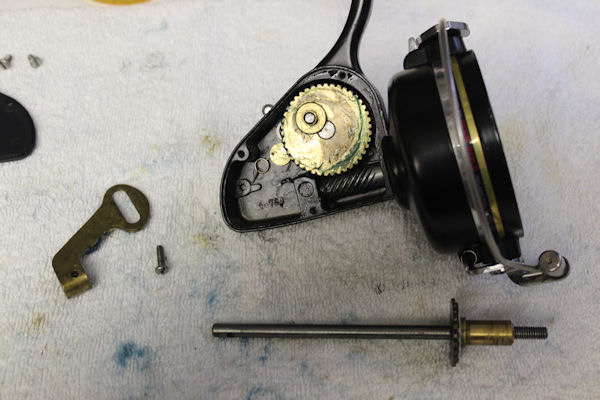
Unscrew the #43 crosswind arm so that you can slide out the #39 spool shaft. Also unscrew the #38 rotor nut and remove the #27 rotor.
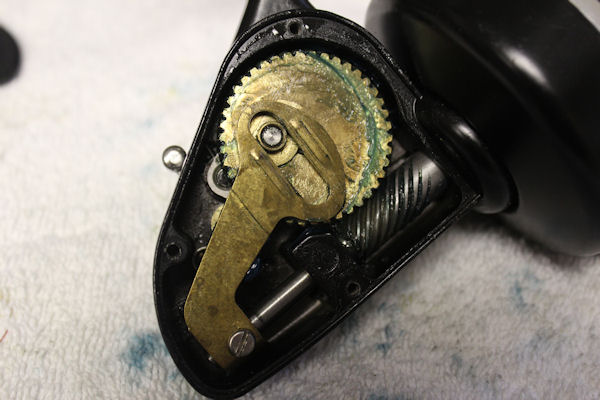
Under the gear you can see the anti-reverse dog and spring and the eccentric, more on that in steps below.
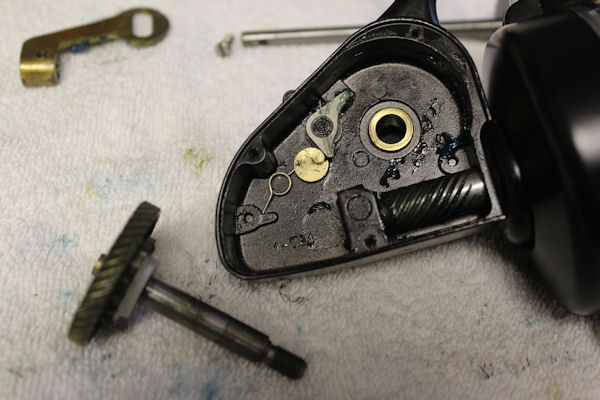
Clean the #8 gear and inspect the teeth for wear. NOTE: Notice only a light amount of grease is needed for the gears, just enough to coat the teeth. We do not recommend stuffing the reel body with grease, as this causes problems, especially with improper greases that may solidfy. Try to use only products specifically designed for reel use.
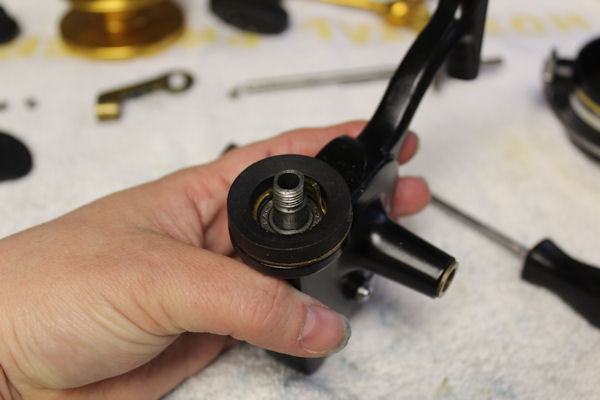
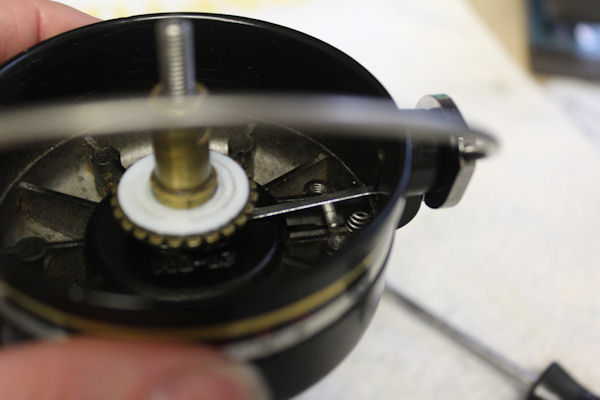
To access the #19 pinion gear, remove the #21B Rotor Brake.
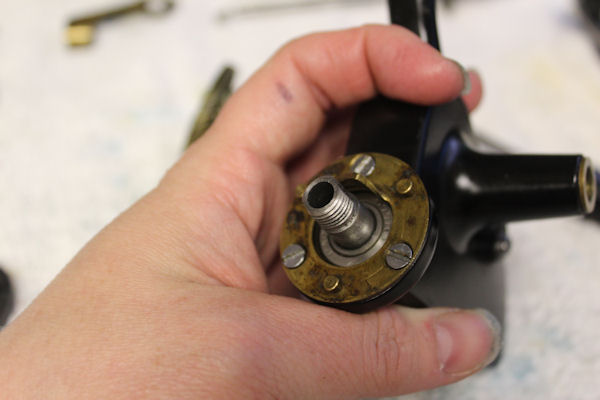
Unscrew the #31B screws to remove teh 21A bearing cover. Slide off the bearing and inspect it. Bearings should spin smoothly, with no grinding or resistance. Slide out the #19 gear to clean it and regrease it, then reassemble.
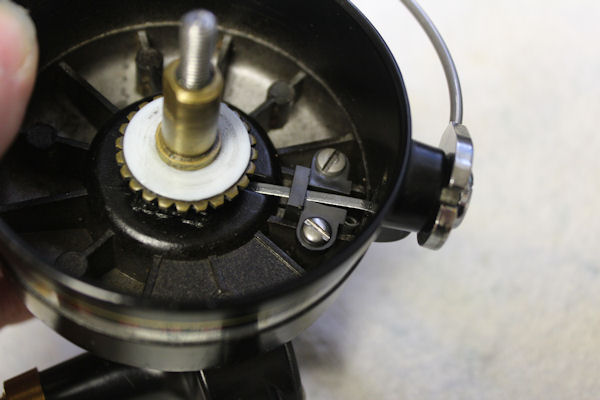
After reinstalling the rotor cup, washer and nut, slide the spool shaft back into the reel and put the crosswind arm back on, lining it up so that the arm runs on the tab on the main gear.
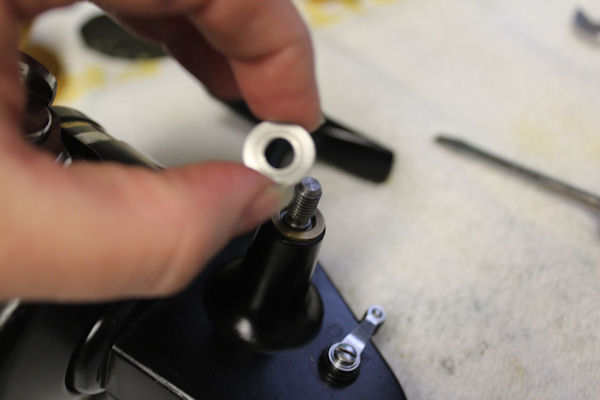
This is the #17 handle washer that goes back on the gear shaft before you screw on the #15 handle assembly
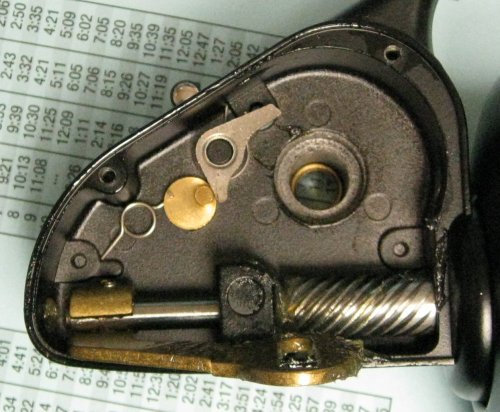
Under the gear you can see the anti-reverse dog and spring and the eccentric, more on that in steps below.
Clean the gear and inspect the teeth for wear.
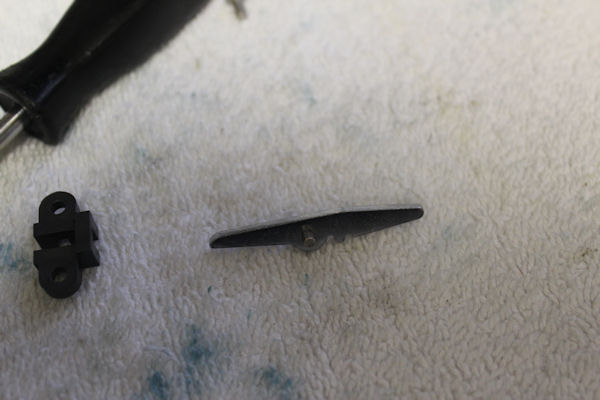
Dog Spring installation on a Penn 700 series spinning reel.
Installing the dog spring on the 700 series can be tricky at first. It will probably take a couple of tries before you have it down. I'm using the 706Z for this example; it should help with any 700 series dog spring installation.

Place the dogspring around that double peg on the housing as shown above, with the straight leg tucked into the corner and the bent leg at rest sticking up.
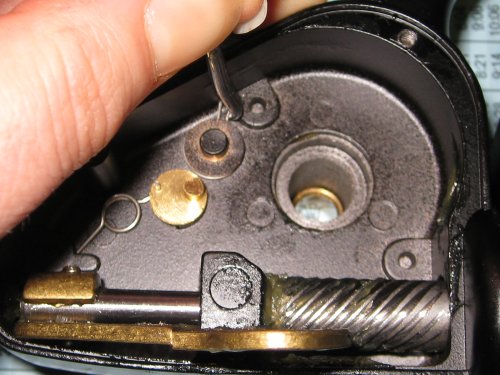
Use a sturdy, slender implement to pull the dog spring into position to install the dog. I'm using my customized icepick with the bent/filed tip that I use for extracting bearings/parts. For the image, I kept the housing facing so that you could see what I was doing. I turned it around to actually install the dog, so that I was pulling the dog spring towards me for a steadier grip on it.
NOT SHOWN: While holding the dog spring in place, I positioned the dog over the peg it sits on, angling the long end of the dog downward so that it could take over holding the bent leg of the dog spring in place. Then I very carefully pulled the tool out and popped the dog the rest of the way onto it's peg. End result is the final position of the dog/dogspring against the eccentric shown above.
Copyright 2008© MysticParts.com/Scottsbt.com
Order parts online for this reel(s):
https://www.mysticparts.com/PennParts/Spinning.aspx#SS1stGen
0 Comments